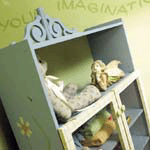
 Transform a basic RTA bookcase into a whimsical cabinet to add charm to your décor.
-
Assemble bookcase following manufacturer's instructions.
-
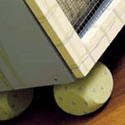
Install finials (feet) on the corners of what would have been the top of the bookcase.
-
Screw through the bookcase and into the feet to secure.
-
Install brackets on the top of your cabinet at the back (normally bottom of bookcase) with glue and nail in place.

Doors
-
Make the 2 doors 16"x45" from 1x2 pine. Cut 4-4.5" sides with a 45-degree mitre and 4-16" ends, glue and nail the corners.
-
Cut hardware cloth into 2 pieces 15" x 44" and staple to the inside of the doors.
-
Install door handles and hinges on door and mount doors on cabinet level with the top of a shelf.
-
Paint to match and enhance your décor.
-
Hand-paint a design or use stencils for more decorative detailing.
Pictured a freehand daisy. Petals were painted in W017 with Yellow Centre.
Paint leaves 4J3-4.
Casual plaid on doors was created by using a fine tip artist's brush and two accent colours. Draw fine lines freehand to create a plaid pattern.
Beauti-Tone Paint Colours :
Bookcase: 2R1-3
Doors: W017, 2R1-3, 4J3-4
Finial Feet: 4J3-4
Dots: 2R1-3 (To create dots simply dip the handle end of an artist's brush in the paint and dab on.)
Materials:
Bookcase: 2653-845 2 Decorative Brackets, 2611-463 4 Fence Finials, 5258-936 4' of 36" Hardware Cloth, 2305-204 2 Wooden Door Knobs, 2130-125 1 1/2" Finishing Nails, 2174-453 (4) 1 3/4" #8 Woodscrews, 2020-495, Carpenters Glue. 24' of 1x2 Pine, Hinges (4)
Tools:
1030-565 Hammer, 1038-228 Miter Box, 1062-049 Mitre saw, 1136-103 Tin Snips, 8212-533 Small Artist Brush